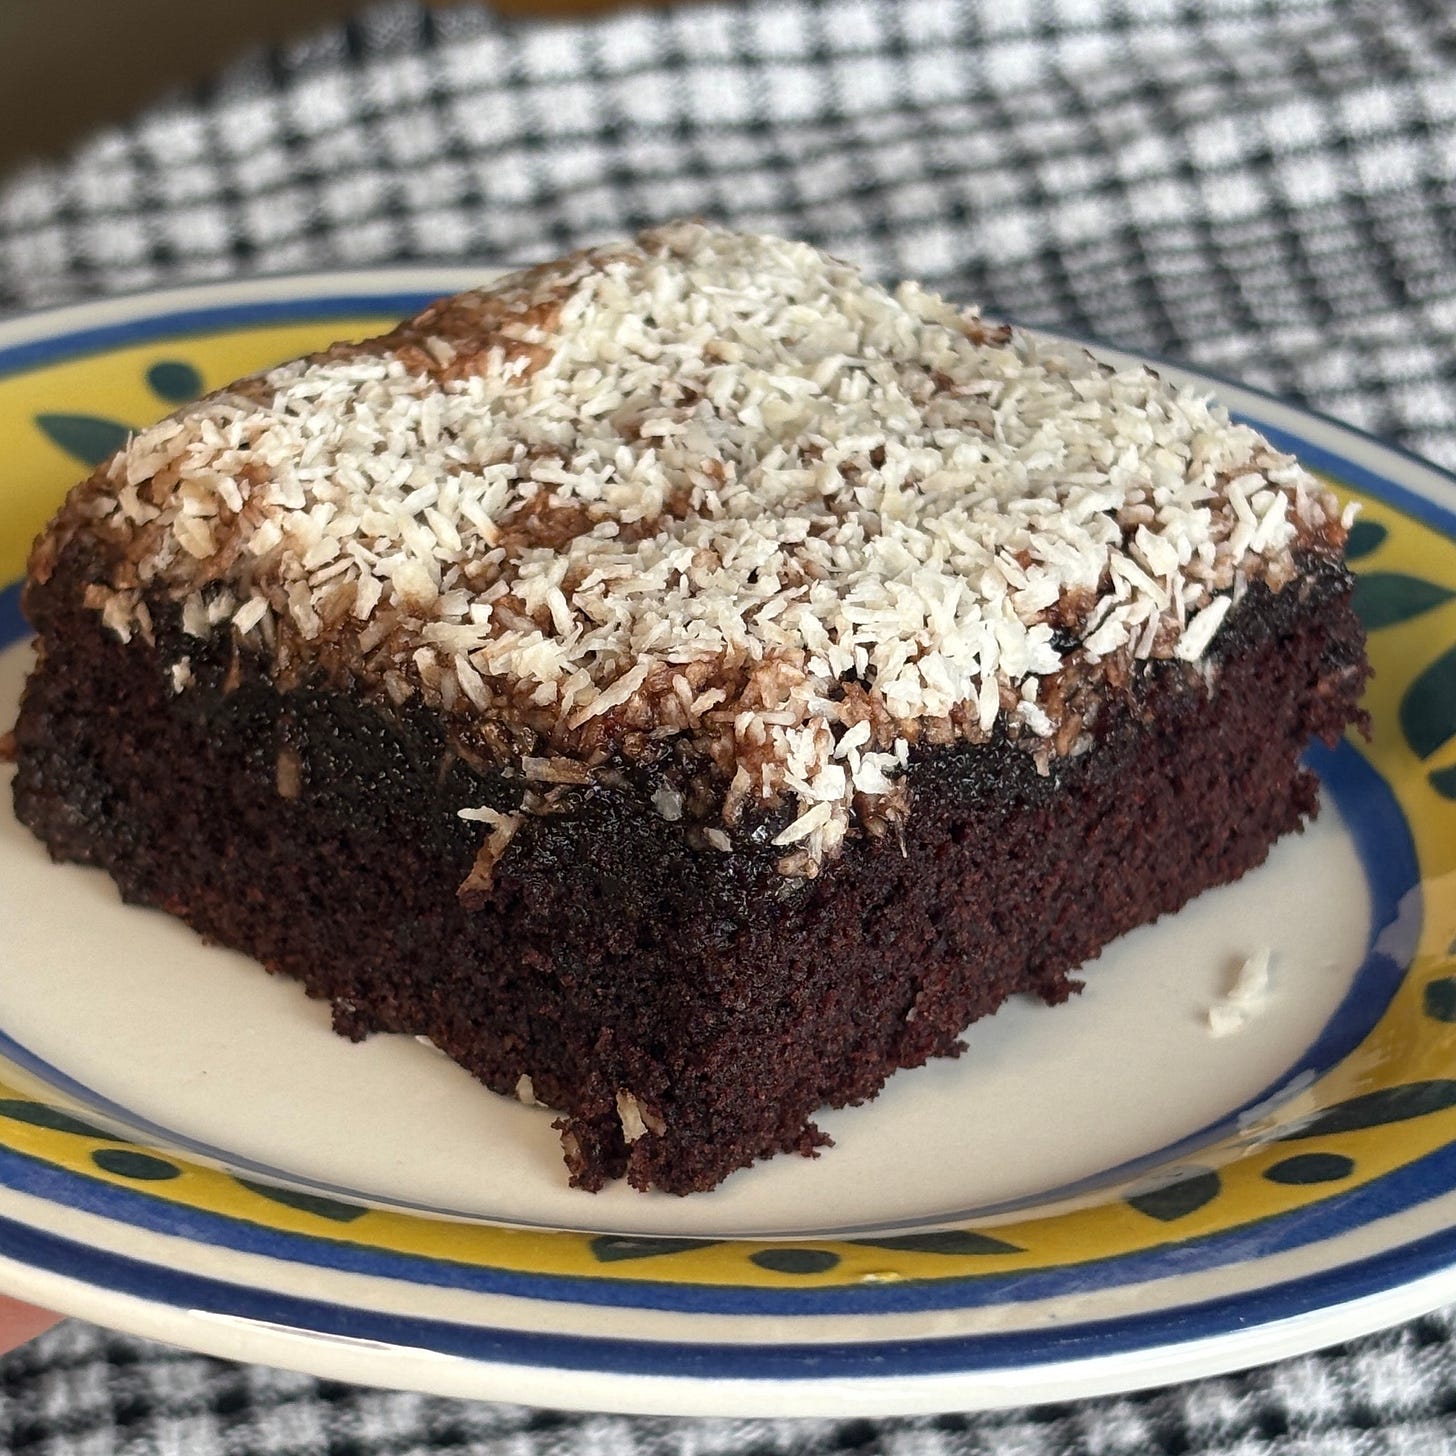
It was recently brought to my attention that this cake exists: a moist, chocolate sponge topped with a coffee-flavoured coconut layer. My partner had a slice at ScandiKitchen in London so he was the ideal person to try my GF version and confirm it was as rich and tender and satisfying as the OG. In Denmark the cake is called “den du ved nok kage”, which literally means “the cake you-know-what”. My understanding is that versions of this cake are made throughout Scandinavian homes, known by different names and using slightly different ingredients and methods. I think you’ll find my version serves it justice. It might even become your cake-you-know-what.
Overview
First, we’ll combine the cocoa powder with boiling water, then add the milk and xanthan gum and blend. Then we’ll cream the butter and sugar, add the eggs, add the cocoa/milk mixture and dry ingredients, then pour the cake into the tin and bake. Then we’ll let the cake cool, remove any doming, melt all the topping ingredients in a saucepan and pour it on top of the cake. Finally, we’ll cover it all with desiccated coconut and serve.
Recipe
Cake
50g dutched cocoa powder
100g boiling water
100g coconut milk OR whole milk (I prefer coconut)
1g (little less than 1/2 tsp) xanthan gum
200g unsalted butter, room temp
225g caster sugar
3 eggs
205g GF plain flour (I use Freee Plain White Flour)
½ teaspoon (3g) salt
1 teaspoon vanilla extract
1 teaspoon baking powder
Topping
150g icing/confectioners sugar
50g unsalted butter
1 tbsp (5.3g) dutched cocoa powder
½ teaspoon vanilla extract
60g strongly brewed coffee (instant is fine)
50g desiccated coconut, plus extra to decorate
sea salt flakes (optional)
Method:
Preheat oven to 170°C (340°F) fan. Line a 20x20cm (8x8 in) cake tin.
Measure cocoa powder into a bowl that is a good depth for blending directly inside. Pour boiling water into the cocoa and whisk (this ‘blooms’ the cocoa, ensuring it doesn’t clump and enhances the flavour of the cocoa). Let this cool for five minutes. Add xanthan gum, whisk, then add the coconut milk and use an immersion blender to blend until everything is well-combined and there are no clumps of xanthan gum.
Cream the butter, sugar and vanilla in a stand mixer, on medium, using the paddle attachment, until lighter in colour and the sugar has begun to dissolve. The mixture should look like thick frosting, not whipped cream. Stop before it gets very pale and fluffy (that means you’ve added too much air, which can make the cake rise unevenly and collapse). Add the eggs one by one, taking care they are completely incorporated before adding the next. Scrape down the sides and bottom of the bowl and beat for a minute more to ensure everything is homogeneous.
In a separate bowl, whisk or sift the flour blend, salt and baking powder.
Add the cocoa mixture to the stand mixer bowl and beat until combined, then scrape the bowl again and beat for another minute. Add the dry ingredients and beat until just combined, scrape the bowl, and beat for another minute until everything is well combined and there are no pockets of butter.
Pour the batter into the lined tin and bake in the middle of the oven for 30 minutes, then check. A skewer should come out with a little moisture, maybe a small crumb. Let it keep baking if any raw batter comes out on the skewer.
Leave the cake to cool in the tin.
After an hour or two, when the cake is room temp, remove the cake from the tin and slice off the dome to create a flat surface for the topping and to expose the crumb. If you skip this step, the topping will settle on the edges and the center of the cake will miss out on all that delicious coconut and coffee.
Poke holes in the cake with a skewer or fork if you want the topping to soak into the cake. I prefer to skip this step to have a more distinct topping layer. Combine all the topping ingredients in a saucepan and cook while whisking until everything is melted. Pour the topping all over the cake and use a spatula to spread it around evenely. Top with extra desiccated coconut and flaky sea salt. Leave to set for at least 30 minutes before serving.
Serving Suggestion: With a cup of filter coffee, of course.
Storage: Keep sealed at room temp for 2-3 days.
Notes for Nerds:
I recommend purchasing a scale that detects tenths of grams, because xanthan gum is both very ‘packable’ (ie the quantity can change significantly if compressed or if scooped while fluffy) and very potent, meaning small differences in quantity can impact your bakes. I use a JSR-150 for weighing gum/salt/baking powder/etc. I purchased it from BakeryBits for £17.
I use Freee Plain White Flour here. If making your own blend, it should be 50% starch (like arrowroot, cornflour, potato starch or tapioca flour), 25% lighter-protein flour (such as brown rice flour or millet), and 25% heavier-protein flour (like buckwheat, sorghum or white teff). If using a blend with xanthan gum already included, and it doesn’t state the concentration of xanthan gum, assume it has 1/4 tsp (0.75g) per 120g flour and adjust this recipe accordingly. If it bakes too crumbly, slightly increase xanthan gum next time; If it bakes too gummy/stodgy, slightly decrease xanthan gum next time.
This is such a fantastic, comforting cake to have on the counter at home. I hope you give it a try and enjoy the best afternoon coffee break of your life.
Follow me on Instagram for videos of my recipes and subscribe below to receive weekly, premium-only recipes via HausMates. Next week I will share my recipe for GF brioche-style buns, and HausMates will receive my recipe for creamy, unctuous coconut custard buns.
What’s HausMates? It’s the elevated version of this newsletter/archive, where you’ll find double the recipes, join in the conversation, and receive one-on-one advice and guidance from me. Free posts become paywalled after some time, so joining HausMates means indefinite access to the full archive of gluten-free recipes. Subscribing is easy and costs £5 (~$6.75) per month or £50 (~$67) per year. This financial support means I can focus on recipe development and consistently providing you all with high-quality newsletters. Come on in!